Solo Double Strap Installation Instructions
The following sequence of photographs shows the basic process of installing a full position kit with bag cage.
|
|
|
|
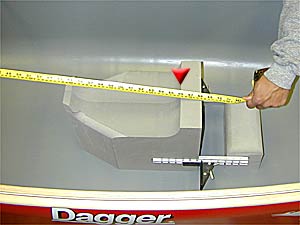
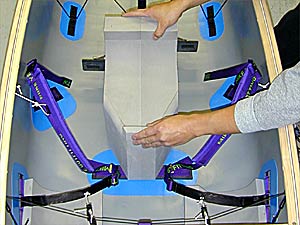
1L Place the pedestal in the boat and measure to the
front edge (red pointer) of the back rest. In symmetrical boats the edge should be
7" back from the center point. For asymmetrical designs consult
with the manufacturer.
|
1R Center the pedestal from side-to-side. Then
trace the outline of both the pedestal and the foot peg block using a
China marker (grease pencil). |
|
|
|
|
|
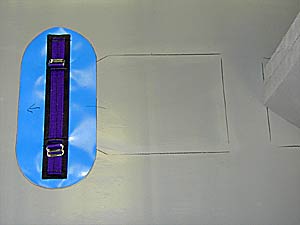
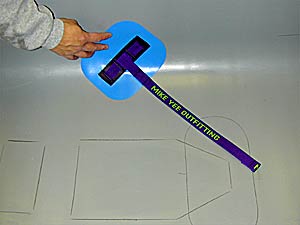
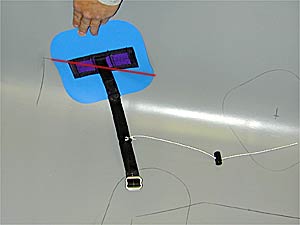
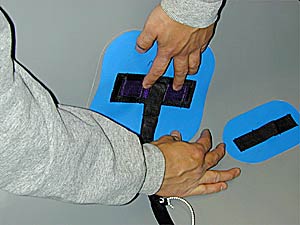
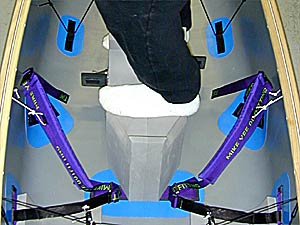
2L Center the crotch anchor to the pedestal and align edge of
black webbing to front edge of pedestal.
|
2R Trace the anchor and make orientation marks for use during installation. | |

|

|
|
|
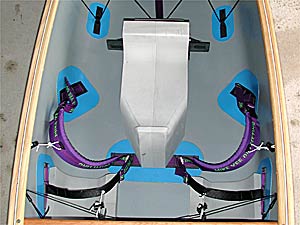
3L Realign the pedestal and adjust placement of the knee
cups. Mark the top corners of each knee cup for knee strap anchor
alignment.
|
3R Make a mark parallel to both ankle bones for centering of the ankle anchor placements | |

|
|
|
|
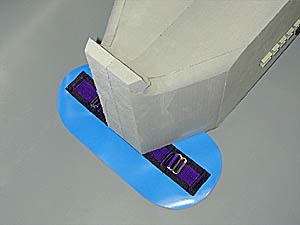
4L Determine height of the ankle anchor based on your comfort
level. Lower placement offers tighter thigh straps but increases
difficulty of escape. Trace the anchor.
|
4R Use measurement from the gunnels to align center point of both knee strap anchors. | |
|
|
|
|
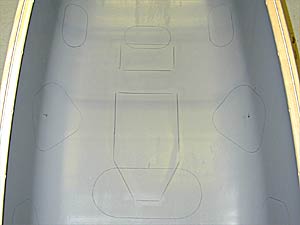
5L Align knee strap anchor so that the center
point is aligned with the top edge (red line) and 1" behind the front
edge
of the knee cup. Trace the anchor.
|
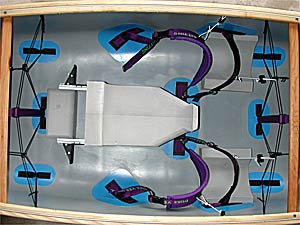
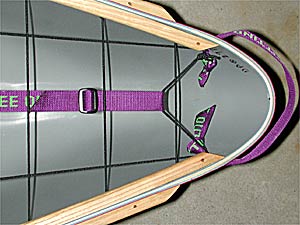
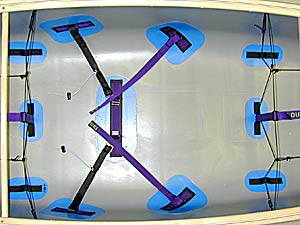
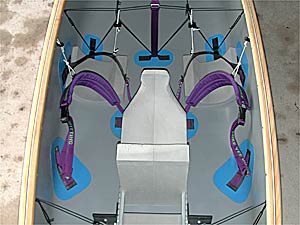
5R Final layout of pedestal, crotch, ankle, knee strap and
bag cage anchors.
|
|

|
|
|
|
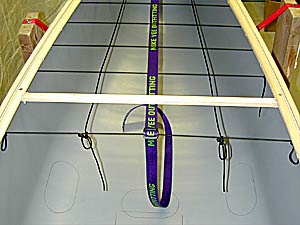
6L Layout bag cage lacing (4" centers), drill
holes and install. Tie loops (one at each gunnel and one on each side
6" out from gunnels) in the final length of lacing for attachment to
bag cage anchors.
|
6R Side view detail of bag cage lacing, center
strap and side lacing attachment.
|
|
|
|
|
|
7L Run 1" center strap and side lacing.
|
7R Detail of front attachment for center straps & lacing. | |

|

|
|
|
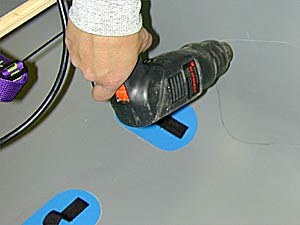
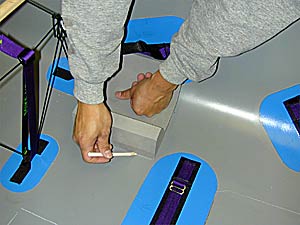
8L Clean areas to be glued with Acetone or MEK (methyl ethyl
ketone). Use sparingly or risk melting the surface plastic. Gloves and respirator
are recommended.
|
8R Apply two thin (let both 1st and 2nd coats dry) coats of Vynabond or Stabond adhesive to (each) anchors and the hull. Do not over apply to hull—too much adhesive will eat into the Royalex. | |
|
|
|
|
9L Use a heat gun or hair drier to warm glue
surfaces just before bonding. This will improve adhesion.
|
9R Position each patch and apply firm pressure to bond. Use a
small roller or wooden dowel to work out any air bubbles and ensure full
surface contact.
|
|
|
|
|
|
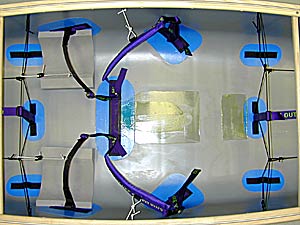
10L All anchors glued in place. Note the completion of the bag
cage and center straps.
|
10R Replace knee cups and fully trace for gluing.
Apply two thin (let both 1st and 2nd coats dry) coats of water proof
contact cement to each knee cup and the hull.
|
|
|
|
|
|
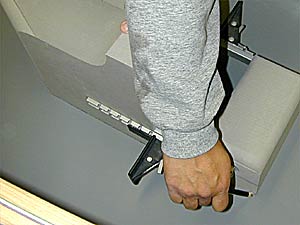
11L Position knee cups and use firm pressure to bond. Use the
same gluing technique for the pedestal.
|
11R Position pedestal and make contact. | |
|
|
|
|
12L Carefully stand on the pedestal to ensure full bonding.
Allow everything to set overnight before stressing the bonds.
|
12R All done! |
|
|
|
|
| 13L Front view | 13R Back view | |